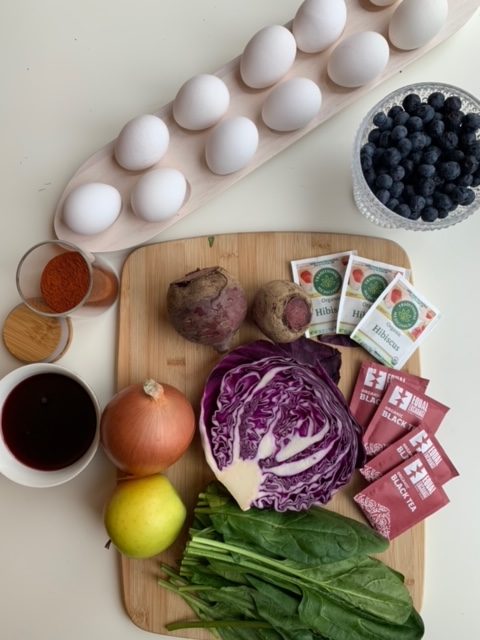
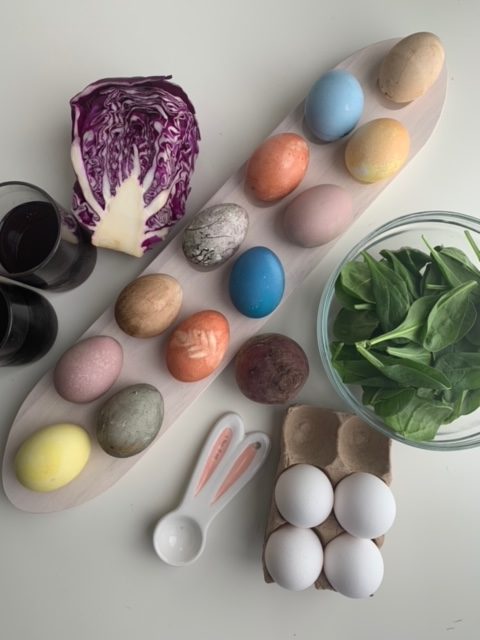
There are plenty of ways to dye Easter Eggs but I prefer a less dying and more rustic approach. If you have little kids in the house, this is a great way to teach them the history of dying and how to be resourceful with the items you have in your house. I partner with Lexington Co+op to shop to show you just how to do it using their fresh produce, spices, and teas!

You can head to Lexington Co+op for all of these beautiful and fresh ingredients to dye your own eggs! I love their grocery store and the kids love helping me shop there! The grocery store has a true community feeling and the produce is from local farms which makes me feel good about shopping there! Remember you don’t have to be an owner to shop there, it’s open to everyone!

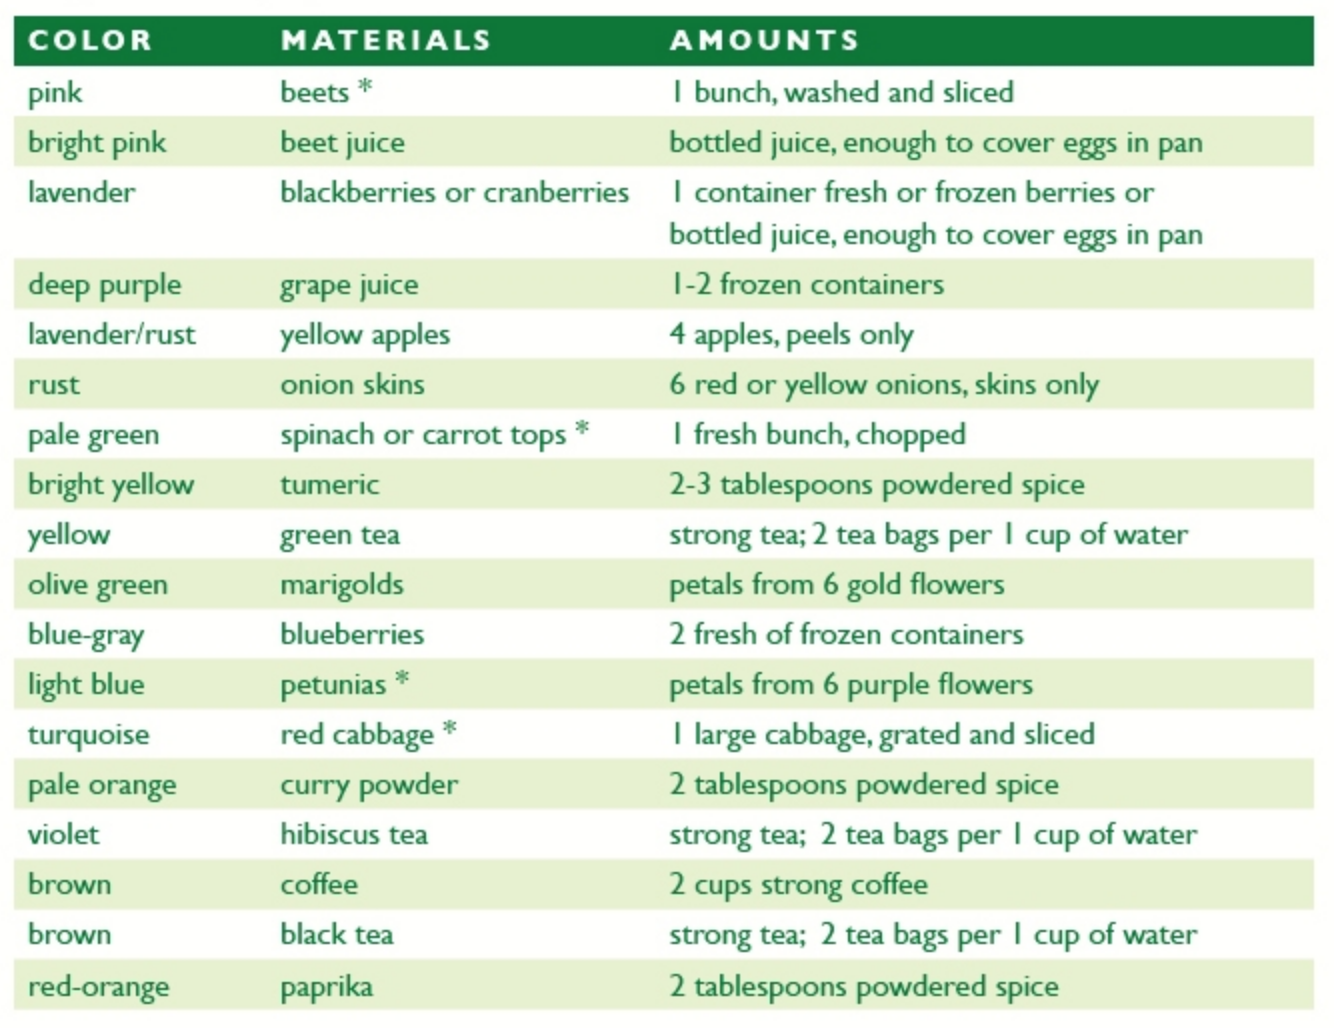
Keep in mind the colors of the dyes varies depending on how concentrated the dye is, what color egg you use, and how long and how many times the eggs are soaked in the dye. Here’s a handy guide to follow below but I have a quick video to to walk you through the process on my IG TV.
Ingredients

- Prep your ingredients: I made separate batches of different colors according to chart above.
- Add water to a saucepan: Pour the amount of water you need for the dye you’re making into a saucepan. I used about 1 cup of water to 1 cup of vegetable.
- Bring to a boil Then add the dye source (purple cabbage, onion skins, etc.)
- Adjust the heat: Turn the heat down to low and simmer, covered, for 30 minutes.
- Check the color: The dye is ready when it reaches a hue a few shades darker than you want for your egg. Drip a little dye onto a white dish to check the color. When the dye is as dark as you like, remove the pan from the heat and let the dye cool to room temperature.
- Strain the dye: Pour the cooled dye through a mesh strainer into another saucepan or bowl into a bowl.
- Vinegar: Stir 1 tablespoon of vinegar per cup of strained liquid.
- Add the eggs: Make sure the eggs are completely submerged.
- Put the eggs in the fridge: Transfer the eggs in the dye to the refrigerator and chill until the desired color is reached (typically 3 hours or over night for a deeper color)
- Dry and oil the eggs: Carefully dry the eggs, and then massage in a little oil to each one for a little shine or don’t for a more rustic look.
Click here to see the whole DIY video! And head on over to the Lexington Co+op for your next grocery trip for the best ingredients and local groceries!

Leave a Reply